For
workshop two our lesson was about the moon. I didn’t realize the Super Moon
would happen the week before my workshop when I planned it. So the
relevance was a nice surprise.
To
start, I was going to show the girls a slideshow of wholly unrelated artwork,
except that the moon was an obvious feature in each and ask them to puzzle out
what they had in common. I ruined the surprise, though, because when the girls
were gathered, I immediately and excitedly pointed to the sample project to
show them what we were going to do.

Doh.
 We went
through the slideshow anyway, and talked a bit about the phases and mythology
of the moon and the moons of other planets. We discussed how the moon is a
satellite (really?) and how the Roman goddess Luna was thought to ride across
the sky in her chariot pulled by bulls and how this is the origin of the words “lunar”
and “lunatic”.
We went
through the slideshow anyway, and talked a bit about the phases and mythology
of the moon and the moons of other planets. We discussed how the moon is a
satellite (really?) and how the Roman goddess Luna was thought to ride across
the sky in her chariot pulled by bulls and how this is the origin of the words “lunar”
and “lunatic”.
Then we
watched a short Youtube video that showed how I wanted the girls to pull prints
and some various techniques they could try. I also showed some examples of
classic and popular moon imagery to help kick start their brainstorming for the
prints.


I
designed this lesson to dip my toes in the waters of TAB (Teaching Artistic Behaviors)
choice-based education methods. I had planned two projects for the class, with centers
for each activity. I told the girls they needed to create one “man in the moon”
foil engraving and one lunar themed print. But after that they were free to
make more pieces at whichever center they preferred.
Overall,
I think this went very well. This girls enjoyed both activities, they took it
seriously and didn’t goof off when I was busy helping others, they didn’t
struggle with ideas or seem confused about what to do, and they helped clean up
at the end.
I didn’t
get any photos in process because there was paint involved. A lot of paint. Why
is there so much paint everywhere? I didn’t even think about touching
electronics. But here are photos of some of our finished moon profiles and
prints:


First,
both of these activities would have been too much in a larger group. Between
the paint and the foil, there were too many supplies around, too many things
going on at once, too much mess, and too little table space. It was an orderly
kind of chaos with five students. But with a larger class, these projects would
need to be separate.
For
specific changes for the foil project: I wanted the girls to trace their
profiles on cardboard using light and shadow. They had a hard time tracing
their own profile. Between the hazy shadow line and the
corrugated cardboard we were using for our backing it was difficult for
unskilled hands to get a clean profile line.
In a
larger class, me tracing the profile would not have been an efficient use of time at all.
What I think I would do differently would be to take profile photos of the
students and print them. Then have the students paste these photos onto their
backing. They are still using the skill of tracing, but tracing on paper and it
would save a lot of time.
I also
ended up doing most of the hot glue for this project. Some of the girls didn’t
want to risk getting burned, others just couldn’t make a non-shaky line with
the hot glue gun. An alternative method that doesn’t produce as clear of raised
lines, but would make the students responsible for the outline would be to use
Elmer’s glue. Elmer's glue takes a long time to dry and, with this method, the students
would probably have to wait until the next class to complete the foil step.
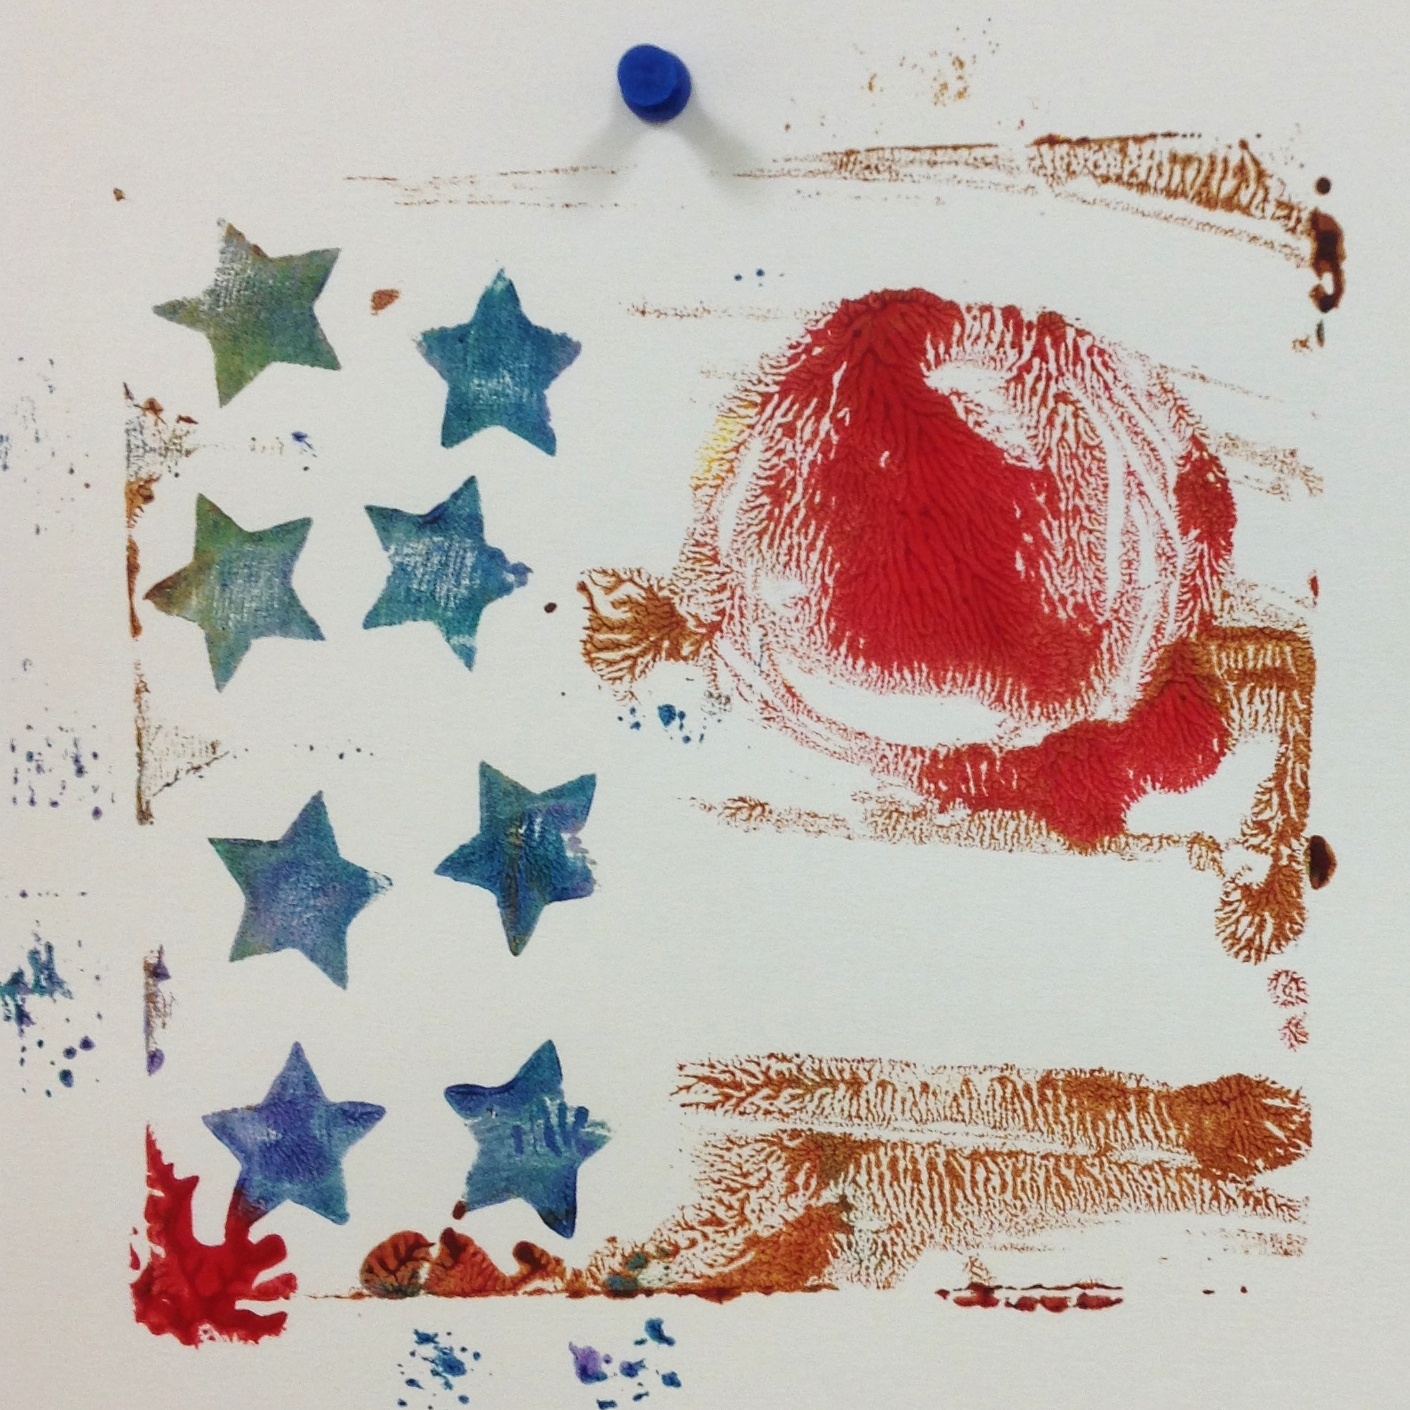
I don’t
have a lot of changes I would make to the printmaking project. Two things stood
out though. First, the craft kind of acrylic paint we were using was simply not
very good for printmaking. It was too mucousy and runny. You can see in some of
the prints that the girls had a hard time getting the paint to roll out nicely
onto their surface. It kept pulling up in little rivulets. An interesting effect, but not desirable for this project. It made stamping techniques ineffective.

When I
did my sample project at home I used tubed acrylic paint. A little thicker, more
average quality, and it worked much, much better. Some girls got frustrated
that their stamps weren’t showing clearly and one girl didn’t like anything she
had printed. When I had them put their names on their prints at the end of
class, I was disappointed to discover this girl had thrown away all her prints!
Below are some of the samples I did with better paint. You can see they are not perfectly crisp but I didn’t struggle the way we all did in the workshop.

Second, I think the girls
would have been happy to experiment with printmaking techniques the whole class, and I
wonder what else they could have come up with with more time and better paint.
I was able to engage the students in a little more reflection this time as we cleaned up. We discussed some of the difficulties we had with the prints and the tracing. We talked about the different techniques they had tried and what had worked best. The girls seemed to be most proud of their moon profiles, but they claimed, unanimously, that they had really enjoyed both projects.
I’m
heartily looking forward to next time.
Another great lesson. 😊
ReplyDelete